Zabbix: two-factor authentication with DUO
17th Feb 2021This article describes how to implement 2FA with DUO as provider in Zabbix server.
If you are not familiar with two-factor authentication then please read this nice introduction. Why DUO? Because at the moment of when this requirement for Zabbix server came up I was working for a company that used DUO 2FA for all services access.
What's added to Zabbix server - when a user logs in and Zabbix server successfully authenticates him/her then 2FA via DUO takes place and only if this users successfully authenticated by DUO he/she is granted access to Zabbix server WebUI. This algorithm is implemented in non-official fork of Zabbix server https://github.com/BGmot/zabbix (see README about different ways to install it). You can read about how Zabbix server interacts with DUO here.
The easiest way to test this solution is to deploy these docker container (if you don't want to touch your Zabbix server instance):
docker run -p 8080:80 --name zabbix-appliance -t -d bgmot42/zabbix-appliance-ubuntu:6.0.0-bg
But before we can test anything you need to set up your DUO account.
Setting up DUO
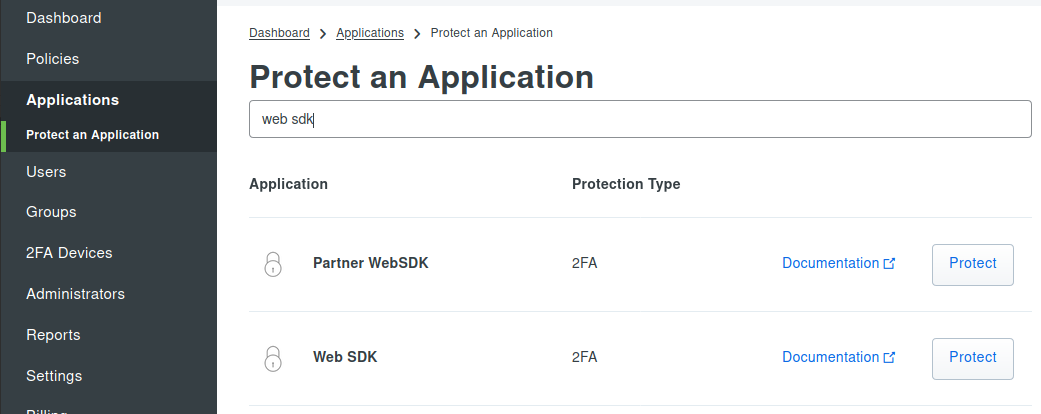
It's very nice of DUO to offer absolutely free not limited by time access to DUO services for up to 10 users so go here and create an account. Login into your 'Dashboard' and select Applications at the left menu, click Protect an Application button. In Protect an Application field put web sdk to filter all the results.
Click on Protect button in Web SDK line and you'll be forwarded to a page with your Web SDK application settings:
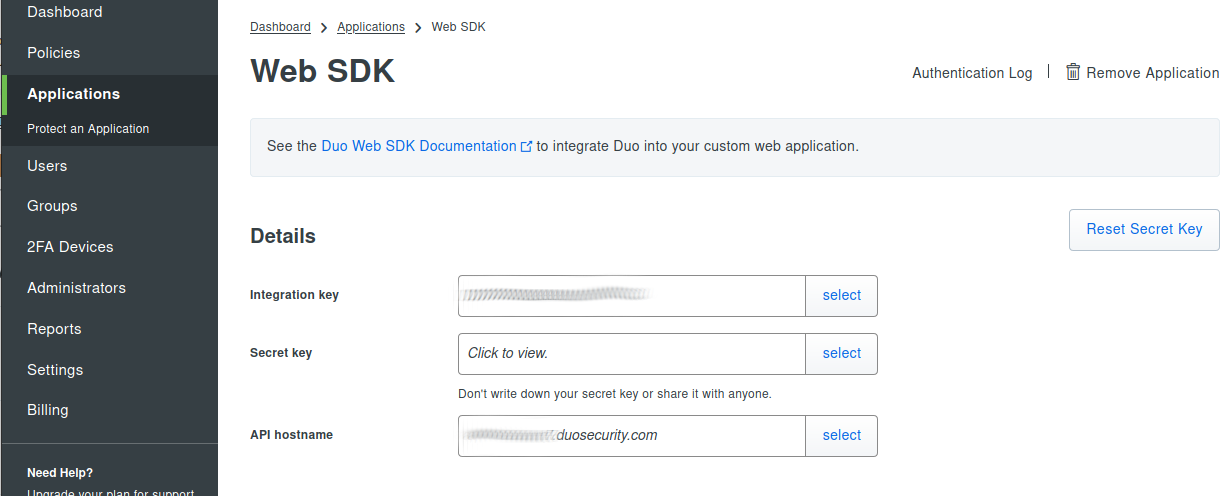
In the next step we will be using these values to configure DUO 2FA in Zabbix server.
Configure Zabbix server
Login into Zabbix WebUI as Admin (if you started container as described above then URL is http://192.168.0.102:8080.
Create a test user if you don't have it already (for demo in this howto bgmot user was created).
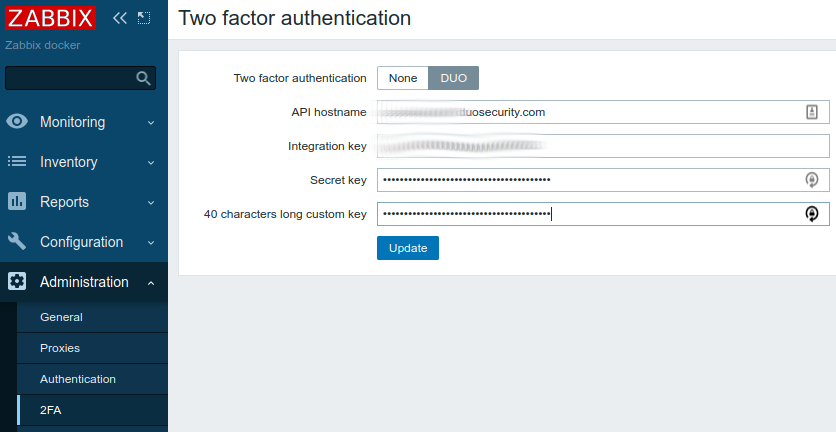
Go to Administration -> 2FA, select DUO and fill API hostname, Integration key and Secret key fields copy-pasting from DUO WebSDK settings. There are two ways to generate 40 characters long custom key:
- Use this on-line service http://www.sha1-online.com/ and generate 40 characters SHA1 key.
- Login into any server that has Python installed and execute:
import os, hashlib
print hashlib.sha1(os.urandom(32)).hexdigest()
So you should have something similar to this in Zabbix server WebUI:
Click Update and the Zabbix server is configured for 2FA!
Testing
Logout out of Zabbix WebUI and login back as a test user, if you entered credentials correctly you'll see DUO's set up page, this means the user has not been set up yet at DUO side.
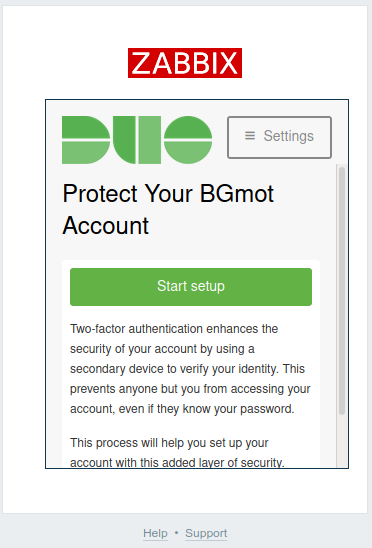
Click Start setup. Select type of device you are going to use for 2FA and answer all other questions, finally you should see this screen:
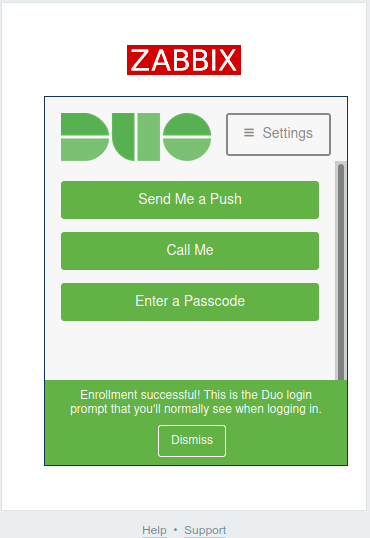
Select the way you want to perform 2FA and authorize accordingly. That's it now you are authorized and should be redirected to Dashboards in Zabbix WebUI. The next time you login you will not need to go through set up process you will only need to select the way to perform 2FA and confirm authentication on your device.
Now if you go back to your Dashboard in DUO and select Users you'll see that new user bgmot has been created. Here you can disable 2FA for this user, disable user effectively disabling his/her access to Zabbix, see timeline when this user logged in and do lots of other cool stuff (read DUO's documentation).